

Key Takeaways
- Start with the crew’s real mission and daily workflow, not a catalog of available accessories.
- Keep frequently used equipment easy to reach, identify, secure, and restock.
- Review weight, visibility, entry paths, power needs, and service access before installation.
- Test layouts with the people who will operate the vehicle in realistic conditions.
- Treat maintenance, inspections, and equipment maps as part of the layout design.
An emergency vehicle is more than transportation. It is a mobile workspace where crews must make quick decisions, retrieve equipment, communicate, and move safely around the vehicle during demanding calls. A thoughtful layout reduces unnecessary searching and helps equipment remain predictable when conditions are not.
Whether an agency is planning a new build or updating an existing unit, more details can help frame the practical choices involved in organizing emergency-vehicle equipment, lighting, storage, and controls. The goal is not to fill every available surface. It is to make the vehicle support safe, consistent work.
Why Vehicle Layout Matters
Under pressure, a poor layout creates avoidable work. A medical bag buried behind other gear, a flashlight stored differently in every unit, or controls that require the driver to look away from the road can all add friction at the wrong moment. Clear storage zones, secure mounting, and logical control placement help crews focus on the scene rather than the vehicle.
Layout also affects the transition between driving and working. Responders should be able to enter, exit, retrieve essential gear, and return equipment without encountering blocked paths or needing to reposition. A well-organized vehicle makes routine checks easier, which supports readiness across shifts.
Start With the Vehicle’s Mission
There is no universal emergency-vehicle layout. A patrol vehicle may prioritize communication equipment, protective gear, and rapid access from the driver’s position. A fire command unit may need planning space, radios, scene lighting, and organized supplies. A rescue truck may require secure storage for heavier tools and sufficient space for multiple crew members to work around the compartments.
Questions to Answer Before Planning
- Who uses the vehicle, and how many people may work from it at once?
- Which tools are used on nearly every call?
- Which items require two-person handling or special lifting practices?
- What must stay secured while the vehicle is in motion?
- What equipment could be replaced, upgraded, or expanded later?
Common call types, travel distance, terrain, weather, shift duration, and parking conditions should all influence the plan. A layout that works on a paved urban route may not suit a unit that regularly operates on uneven ground or in severe weather.
Map the Crew’s Workflow
Effective layouts follow real work patterns. Before selecting mounts or drawer systems, walk through the tasks a crew completes from dispatch through return to service. Include the driver, supervisor, technician, medic, officer, or firefighter who will use the vehicle most often.
- List the most common tasks performed from or around the vehicle.
- Identify the tools, supplies, and technology needed for each task.
- Note where each crew member stands, sits, or moves.
- Mark doors, exits, controls, and paths that must remain clear.
- Place high-use equipment along the shortest safe access path.
This process often exposes small inefficiencies that are difficult to see on a diagram. It can also prevent a design from forcing crews into awkward movements that conflict with established, safe habits.
Place Equipment by Frequency and Risk
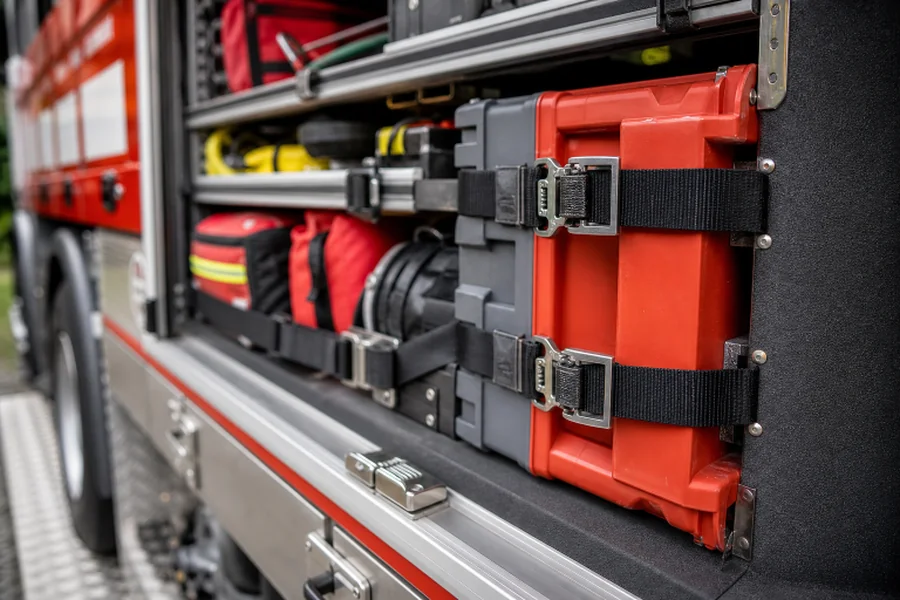
Organize equipment into daily-use, occasional-use, and emergency-only categories. Daily-use items should be accessible without moving other equipment. Occasional-use items can be stored farther away if they remain clearly labeled. Emergency-only gear must still be immediately recognizable and reachable when needed.
- Keep heavy items low, restrained, and close to a stable lifting height when possible.
- Use consistent labels and dedicated locations to support inspections and restocking.
- Prevent one item from blocking access to another.
- Choose mounts and latches that hold equipment securely during travel.
Loose equipment can shift during hard braking, sharp turns, or a collision. Before approving a storage location, ask whether a parked crew member can safely reach the item, remove it without rearranging other gear, keep it secure in transit, and find it quickly as a new team member.
Balance Weight, Space, and Stability
Every added component affects the vehicle. Storage systems, radios, lighting, batteries, command equipment, medical gear, and tools all contribute to the total weight. Agencies should document the weight and location of major additions, then review payload limits, axle loading, suspension needs, and manufacturer guidance before finalizing the build.
Weight placed high or concentrated in one area can affect handling and braking behavior. Compact storage is valuable, but it should not eliminate safe walking space, block a door, or make service panels inaccessible. The best use of space is not necessarily the greatest amount of stored equipment.
Integrate Lighting and Technology Carefully
Warning lights, scene lights, radios, cameras, mobile computers, GPS devices, chargers, and auxiliary power should operate as one coordinated system. Critical controls should be easy to identify and positioned to minimize driver distraction. Lower-priority functions should not compete with essential warning, communication, or safety controls.
Protected wiring, appropriate power capacity, documented fuse locations, and accessible service points make future troubleshooting more manageable. Recent emergency response research also shows how data-driven tools can support operational planning. Technology can inform decisions, but trained personnel must remain responsible for judgment at the scene.
Test the Layout Before Deployment
A completed installation should be tested before it becomes the fleet standard. Have actual users perform common tasks during day and night conditions. Test while wearing gloves, working around other personnel, using typical protective equipment, and operating in limited lighting when possible.
Observers should record delays, blocked paths, awkward reaches, unclear labels, and controls that are difficult to distinguish. Small adjustments made after one vehicle trial can be far easier than correcting the same issue across multiple units.
Build a Maintenance Plan
An upfit remains dependable only when it is inspected and maintained. Regular checks should cover warning and scene lights, mounts, drawers, latches, electrical connections, charging equipment, radios, cameras, computers, labels, and emergency access points. Crews should report small defects before they become failures during a call.
Roadway awareness also matters. First-responder interactions with other vehicles remain a safety concern, particularly around active scenes where lights, cones, smoke, fire, and personnel may be present. Clear lighting, visible markings, and unobstructed access points support safer operations.
Avoid Common Layout Mistakes
- Adding new equipment without removing obsolete or duplicate items.
- Mounting heavy gear too high in the vehicle.
- Blocking doors, windows, mirrors, controls, or emergency exits.
- Using inconsistent layouts across similar units without an operational reason.
- Ignoring repair access until equipment needs service.
- Selecting technology before confirming the crew’s workflow.
- Failing to update the equipment map after changes are made.
Final Considerations
The strongest emergency-vehicle layout feels simple during a difficult call. Begin with the mission, map the workflow, place equipment by use and risk, review weight and access, integrate technology carefully, test with real users, and maintain the system over time. The best design is not the one with the most equipment. It is the one that helps trained crews work safely, quickly, and consistently.