

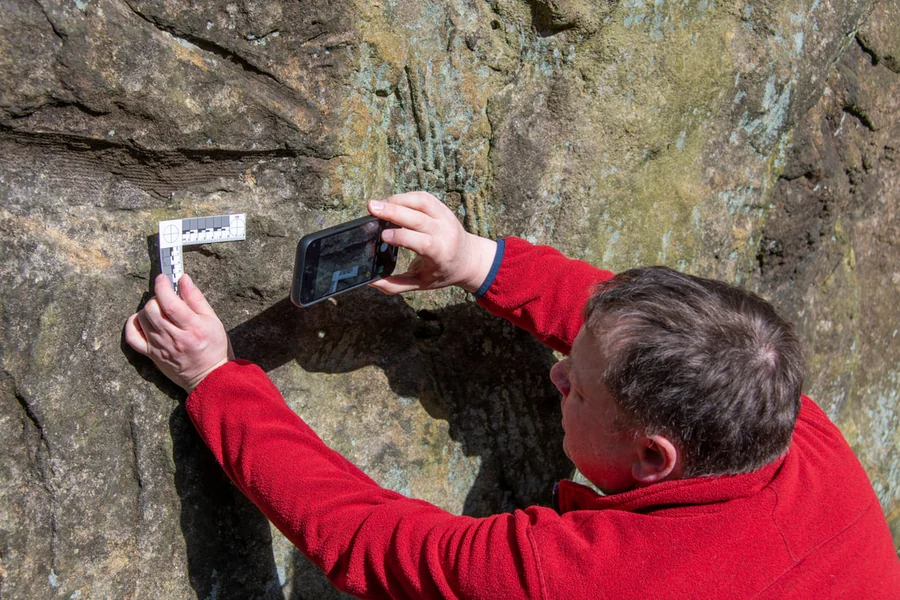
Beginners often leave the trail with a phone full of rock photos and very little to say about them later. The stone looked obvious in the creek—banded, heavy, maybe sparkling—yet at home the colours flatten, the scale disappears, and a dozen look-alike names compete for the same thumbnail. You do not need a geology degree to fix that gap. You need a field habit: photograph carefully, note what you can still feel in your hands, and treat every label as provisional until a second source agrees.
This guide is for weekend hikers, science-curious students, and anyone who wants field stones to become a learning record instead of a blurry camera roll. The goal is education, not collecting. Photograph in place, leave protected sites intact, and use names as memory aids for noticing—not as trophies.
Why field photos beat memory alone
Rocks teach landscape literacy. A sandstone ledge explains a dry slope; a basalt flow hints at old lava; limestone often tracks with springs and caves. When you can tell a few common types apart, maps and trail signs start to make more sense. Photos are the bridge between the moment and the notebook. Memory edits colour and texture; a clear image set does not.
There is also a safety and ethics angle. Unstable cuts, mine dumps, and fragile habitats are better studied from a respectful distance. Good documentation keeps curiosity alive without turning every walk into a pocketful of specimens from land that is not yours to take.
Pack light, photograph on purpose
You already carry the main tool: a phone with storage and battery left. Add a coin, lens cap, or finger for scale in at least one frame. Optional extras help—a small power bank, a notes app template, a hand lens if you own one—but they are not required for a useful first workflow.
Before you start shooting, decide what question you are answering. Is this bedrock in place, a loose cobble, road fill, or landscaping stone that hitchhiked onto the trail? That context later decides whether a name even belongs to the landscape you walked.
A beginner photo checklist that still works months later
One distant snap rarely helps. Build a short set the way a field scientist would:
- Context wide. Step back. Show the rock on the trail bed, in a creek, on a scree slope, or beside a root. Habitat tells you float versus bedrock versus fill.
- Specimen fill. Move in until the stone dominates the frame. Loose pieces: both main faces. Bedrock: the weathered surface plus any already-exposed fresh face. Do not smash rock for a “better� break.
- Scale. Place a coin or fingertip at the edge of one shot. Without scale, a pebble and a boulder look identical on a screen.
- Light and moisture. Soft side light shows crystals and layering better than harsh noon glare. If the rock is wet, take one wet photo and one after it air-dries—water exaggerates colour.
- Texture detail. Capture grain size, sparkle, fossils, banding, chalky coatings, or rust stains. Those details separate look-alikes.
- Skip dramatic filters. Auto-brightness for readability is fine; heavy filters distort colour and make later comparison harder.
Three to five photos per rock is usually enough. More becomes noise unless you are documenting a complex outcrop.
Notes you should write before you leave the parking lot
Photo files lose context fast. Same-day notes beat clever software:
- Date and trail name or nearest landmark
- Rough location (junction, mile marker, GPS if you use it)
- Setting: creek, road cut, talus, beach, summit scree
- Size estimate (matchbox, fist, backpack)
- Colour dry versus wet if they differ
- Feel: heavy for size, chalky, glassy, sandy, layered
- Other clues: fossils, holes, sparkle, vinegar reaction tested later at home on a scrap you already own—not on protected outcrops
Keep the language observational. You are building a science notebook, not a lab claim.
From gallery to a careful shortlist of names
At home, sort photos by trail and date. Open a regional field guide, park brochure, or trusted state geology overview beside your notes. Work broad first:
- Layered (often sedimentary) or crystalline (often igneous or metamorphic)?
- Coarse crystals visible to the eye, or fine and smooth?
- Soft enough to scratch, chalky powder, or unusually dense?
Match the set to two or three candidate names, then read look-alikes. Many trail stones are ordinary—granite, basalt, sandstone, limestone, quartzite, shale—and ordinary is still worth knowing. When your photos are clear but your shelf is thin, field photo rock ID for beginners can help you compare a careful upload against common rock and mineral types so you leave with a shortlist to check against local maps and guides. The free browser tool lets you start without signup and typically allows a few free IDs per day—useful for learning, not for declaring a final verdict from one screen.
Whatever method you use, mark confidence: sure, probable, or unknown. Location matters. A rock common in one range may be rare two valleys over. If your “find� matches driveway aggregate, say so and move on.
Learning habits that stick
Name a few stones on routes you repeat. Habitats click into place—why one ridge holds oaks and another pines, where cold water emerges, which ledges feel different underfoot. Share finds carefully online: blur exact coordinates near sensitive sites, and never treat an app suggestion as permission to collect.
Copy this compact list into your notes app for the next outing:
- Wide context photo
- Close faces plus one scale shot
- Wet/dry colour if relevant
- Date, trail, setting, size, texture
- Two candidate names and look-alikes checked
- Confidence label: sure / probable / unknown
Field geology for beginners is mostly patience with light, scale, and notes. The photograph is evidence. The name is a hypothesis you keep refining—and that is how science literacy grows one trail at a time.